
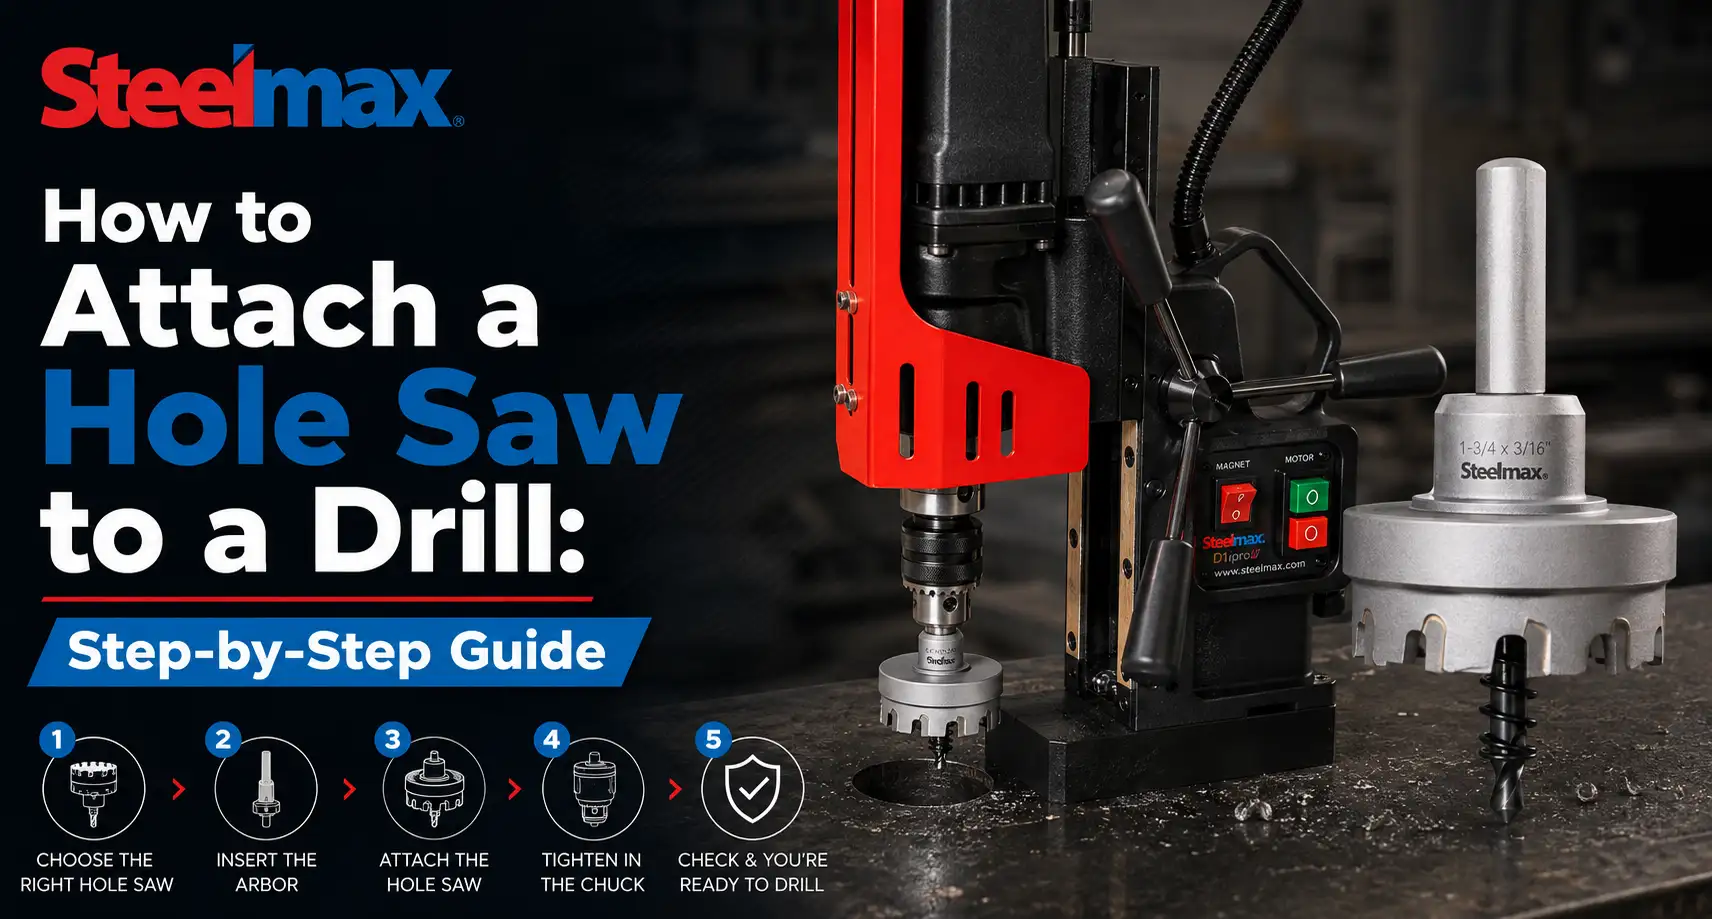

Getting a clean, correctly sized hole in wood, plastic, or metal starts with mounting the saw right, not just picking the right diameter. This guide covers how to attach a hole saw to a drill using an arbor and pilot bit, plus the safety checks worth running before the trigger gets pulled.
Whether it’s a first project or a repeat job on a panel or enclosure, the steps below apply the same way every time.
What Is a Hole Saw (and Why Attachment Matters)
A hole saw is a cylindrical, tooth-edged cutting attachment used to bore round holes larger than a standard twist bit can manage. It shows up constantly in wood, plastic, drywall, and, with the right saw, metal.
Basic Function
The saw’s teeth ring the outside of a hollow cylinder. As the assembly spins, those teeth cut a circular kerf while the pilot bit at the center keeps the whole unit tracking straight.
Why a Separate Arbor Is Needed
A hole saw doesn’t attach directly to a drill chuck on its own. It needs an arbor, sometimes called a mandrel, along with a pilot bit as the connecting hardware between the saw and the chuck.
That’s precisely why correct attachment is a skill in itself. Get the arbor and pilot bit wrong, and the saw either won’t seat or won’t cut straight once it does.
A loose or mismatched connection at this stage carries into every step that follows, so it’s worth getting right before the drill ever powers on.

What You’ll Need Before You Start
A short list of parts and PPE covers nearly every attachment job, regardless of hole size or material.
Hole Saw, Arbor, and Pilot Bit
Start with the correct diameter hole saw for the job, a compatible arbor or mandrel, and a pilot bit sized to fit the arbor’s center hole. If the arbor uses a set screw, keep a hex key on hand to secure it.
Drill and Chuck Type
Match the arbor’s shank to a drill with a compatible chuck. Add safety glasses, gloves, and cutting lubricant to the list when cutting metal.
Steelmax’s carbide and TCT hole saws come with a built-in spring-loaded center pilot, which simplifies positioning and helps keep the saw centered as it engages the material.
Having the right parts on hand before starting keeps a job moving, rather than stalling halfway through assembly to hunt down a missing hex key or an undersized pilot bit.
How to Attach a Hole Saw to a Drill: Step-by-Step
The full assembly sequence consists of four steps in order, and skipping ahead is where most attachment problems begin.
Step 1: Install the Pilot Bit in the Arbor
Insert the pilot bit through the arbor’s center hole and secure it with either a set screw or a push-fit connection, depending on the arbor’s design. Check the manufacturer’s instructions for the specific kit, since the order for installing the pilot bit can vary by brand.
Step 2: Thread the Hole Saw onto the Arbor
Thread the hole saw itself onto the arbor’s threaded collar until it seats snugly against the shoulder. This step is the core of how to attach a hole saw to a drill, since a loose-threaded connection undermines everything that follows.
Step 3: Seat the Arbor Shank in the Drill Chuck
Insert the arbor’s shank into the drill chuck and tighten the chuck fully. Hand-tighten first, then use an open-end spanner on the arbor if the design calls for it to confirm nothing is loose before drilling.
Step 4: Test for Play Before Drilling
Check that the pilot bit sits centered and protrudes slightly below the hole saw’s teeth, so it guides the cut before the teeth make contact. Spin the assembly by hand first to catch any wobble.
Once everything spins true by hand, the setup is ready. That short manual check catches most seating problems before they turn into a ruined hole or a stalled cut partway through.
Threaded Arbors vs. Quick-Release Mandrels
Two mounting styles cover most hole saw kits on the market, and knowing which one is in the toolbox changes how the attachment works.
Threaded Arbors
Threaded arbors screw the saw directly onto the arbor’s threads until it seats against a shoulder. This style is common and straightforward and typically needs nothing more than hand-tightening or a spanner for a final check.
Pin-and-Nut Mandrels
Quick-release or pin-style mandrels use nubs on the mandrel that align with holes in the back of the saw. A locking nut, or in some systems a latch or pullback-and-click mechanism, secures the connection instead of threads.
To identify which type of kit is used, simply do a quick visual check. A thread pattern on the arbor indicates a threaded system, while nubs paired with matching holes on the saw indicate a pin-and-nut design.
Neither style is inherently better. The right choice usually depends on which system the drill kit or hole saw brand was designed around from the start.
How to Attach a Hole Saw to a Magnetic Drill
On a magnetic drill, the hole saw or arbor, typically mounts the same way it would on any drill, straight into the machine’s chuck.
Chuck Compatibility on Mag Drills
Confirm the chuck is rated for hole saws rather than built exclusively for Weldon-shank annular cutters, since the two mounting styles aren’t interchangeable without the right adapter. Steelmax’s mag drill accessories line includes chucks and arbors built to let a mag drill run standard hole saws alongside annular cutters.
Skipping this check is one of the more common reasons a hole saw simply won’t seat on a magnetic drill set up primarily for annular cutting.
Positioning the Magnetic Base
Magnetic drills add an extra step before the chuck and arbor process is applied. Position the base on a clean, flat ferrous surface and engage the magnet fully before mounting the saw or drilling anything.
Magnetic drills rely on that magnetic hold for stability, so a weak or uneven contact point undermines the whole setup before the bit even touches the material.
Common Mistakes When Attaching a Hole Saw
A handful of recurring errors account for most problems with hole saws, and each is preventable.
Loose or Off-Center Fit
A hole saw that isn’t fully seated against the arbor shoulder tends to walk off-center mid-cut. That same issue shows up when the pilot bit isn’t centered or doesn’t protrude far enough to guide the cut properly.
Wrong Arbor Size
Mismatched arbor and hole saw sizing is a common and avoidable error. Confirm that the arbor’s thread pattern or pin spacing matches the saw before assembly, not after the chuck has been tightened.
Under-Tightened Chuck
A chuck that isn’t tightened enough causes wobble, and that wobble compounds as the saw generates torque during the cut. A loose attachment isn’t just a quality issue. Hole saws generate real torque, and a loose fit can bind or spin free mid-cut.
Any one of these three mistakes tends to show up the same way: a hole that comes out oval instead of round or a saw that binds and stalls the drill partway through the cut.
Safety Tips Before You Drill
A handful of habits, repeated every time, cover most of the risk involved in attaching and running a hole saw.
Power Off During Assembly
Unplug the drill or remove the battery before assembling or changing a hole saw. This single habit prevents the most common accidental start injuries during setup.
Secure the Workpiece
Clamp or otherwise secure the workpiece so it can’t spin if the saw catches. A piece that’s free to rotate turns a minor bind into a real hand or wrist injury fast.
Research published by the CDC’s National Institute for Occupational Safety and Health, based on surveillance data, documented tens of thousands of injury claims related to power hand tools in a single sample year.
That figure underscores why a secured workpiece and a properly seated bit both matter every time, as detailed in this CDC-hosted hand tool injury surveillance study.
Start Slow, Clear Debris
Start the drill at low speed before applying pressure, and back the hole saw out periodically while it’s still spinning to clear debris and prevent binding. Wear safety glasses and gloves throughout the entire process.
Ensure that the bit or attachments are properly seated and tightened in the chuck, specifically when using a hole saw cutter without the pilot drill.
Getting the Setup Right Every Time
Getting the arbor, pilot bit, and chuck seated the first time correctly saves a reworked hole and a dulled saw later. Following the same four steps each time makes hole saw setup a quick, repeatable habit instead of a guessing game.
From here, Steelmax carries the hole saws, arbors, and mag drill accessories to build out a kit that matches the job in front of you.
Frequently Asked Questions About Attaching a Hole Saw
Can I attach a hole saw directly to a drill chuck?
No, a standard hole saw can't go straight into a chuck without an arbor. The chuck grips a round shank, and most hole saws don't have one built in.
Why won't my hole saw stay tight on the arbor?
A loose fit usually means the saw isn't threaded all the way onto the arbor's collar, or the pin-and-nut connection isn't fully locked. Reseat the saw and confirm it sits flush against the shoulder before tightening anything further.
Can the same arbor fit different hole saw sizes?
Many arbors accept a range of hole saw diameters with a compatible thread or pin pattern, though not all sizes. Check the arbor's specifications against the saw's back plate before assuming a fit.


Leave A Comment
You must be logged in to post a comment.